 This is nothing more than using torn paper as a mask and stippling color on. (You could also sponge -- it would be faster but I think you get less control and I usually get those pesky fingernail blotches when I sponge.) The tip is to use the darkest color in the foreground and gradually lighten it with each successive layer of hill in the background.
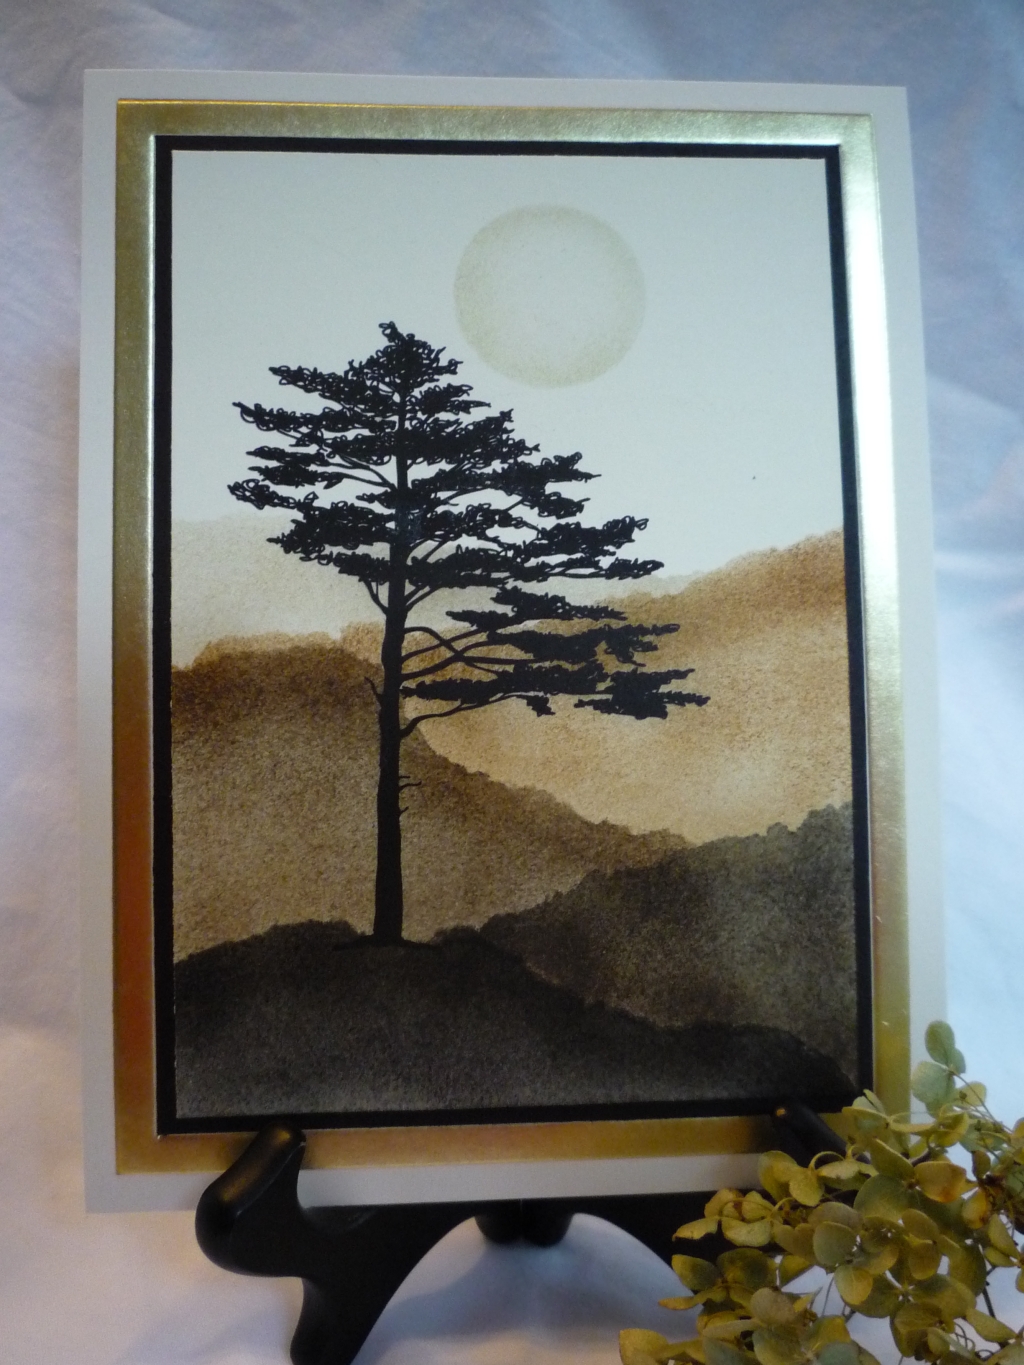
 I used mostly Tim Holtz' Distress inks, and used black soot in the foreground, but not so very black as to obliterate the black pine tree, and then faded through shades of brown (walnut stain and vintage photo). Another tip is to use clean torn paper for each layer, so you don't get stray ink residue. I tell you this because that happened to me. A gum eraser removed most of it -- can you find the spot? ;-) . I did a reverse circle mask for the moon with a post it note, and used the lightest ink color (Stampin' Up's River Rock) and a smaller stipple brush to darken the edges so you get the illusion of the moon.
It was matted on to a black layer, and then on to a 6x8 invitation card with a gold band (a no-fold panel). I think they are really meant for do-it-yourself wedding invitations but it worked great for this. I added absolutely no embellishment, not even glitter on the moon. It was hard to restrain myself, but I wanted it to be stark and unadorned, like the pine image itself.
A torn paper mask is one of the simplest techniques, and can give great results. Enjoy!
Gorgeous! Thanks for sharing the inspiration and the how-to on this one.
ReplyDeleteR/
Ooooh! I'm going to have to try that, thank you for sharing the techniques. :D Lovely card!
ReplyDeleteLovely Marge!
ReplyDeleteTake care and STAY POSITIVE!
That is gorgeous. A very "Marge" card.
ReplyDeleteI can't tell you how inspiring your art work is! I'm SO afraid of "backgrounds". Thanks so much for breaking down the steps. I'm going to get brave and try this one of these days. Thanks for sharing!!!
ReplyDeleteBeautiful, Marge. Great tips on torn paper, too! Thanks!
ReplyDeleteFabulous job, Marge! I love this!
ReplyDeleteWow, Marge! This is gorgeous!!!!
ReplyDelete